Flutterwave standard
This shows you how to accept payments using the Flutterwave standard integration flow
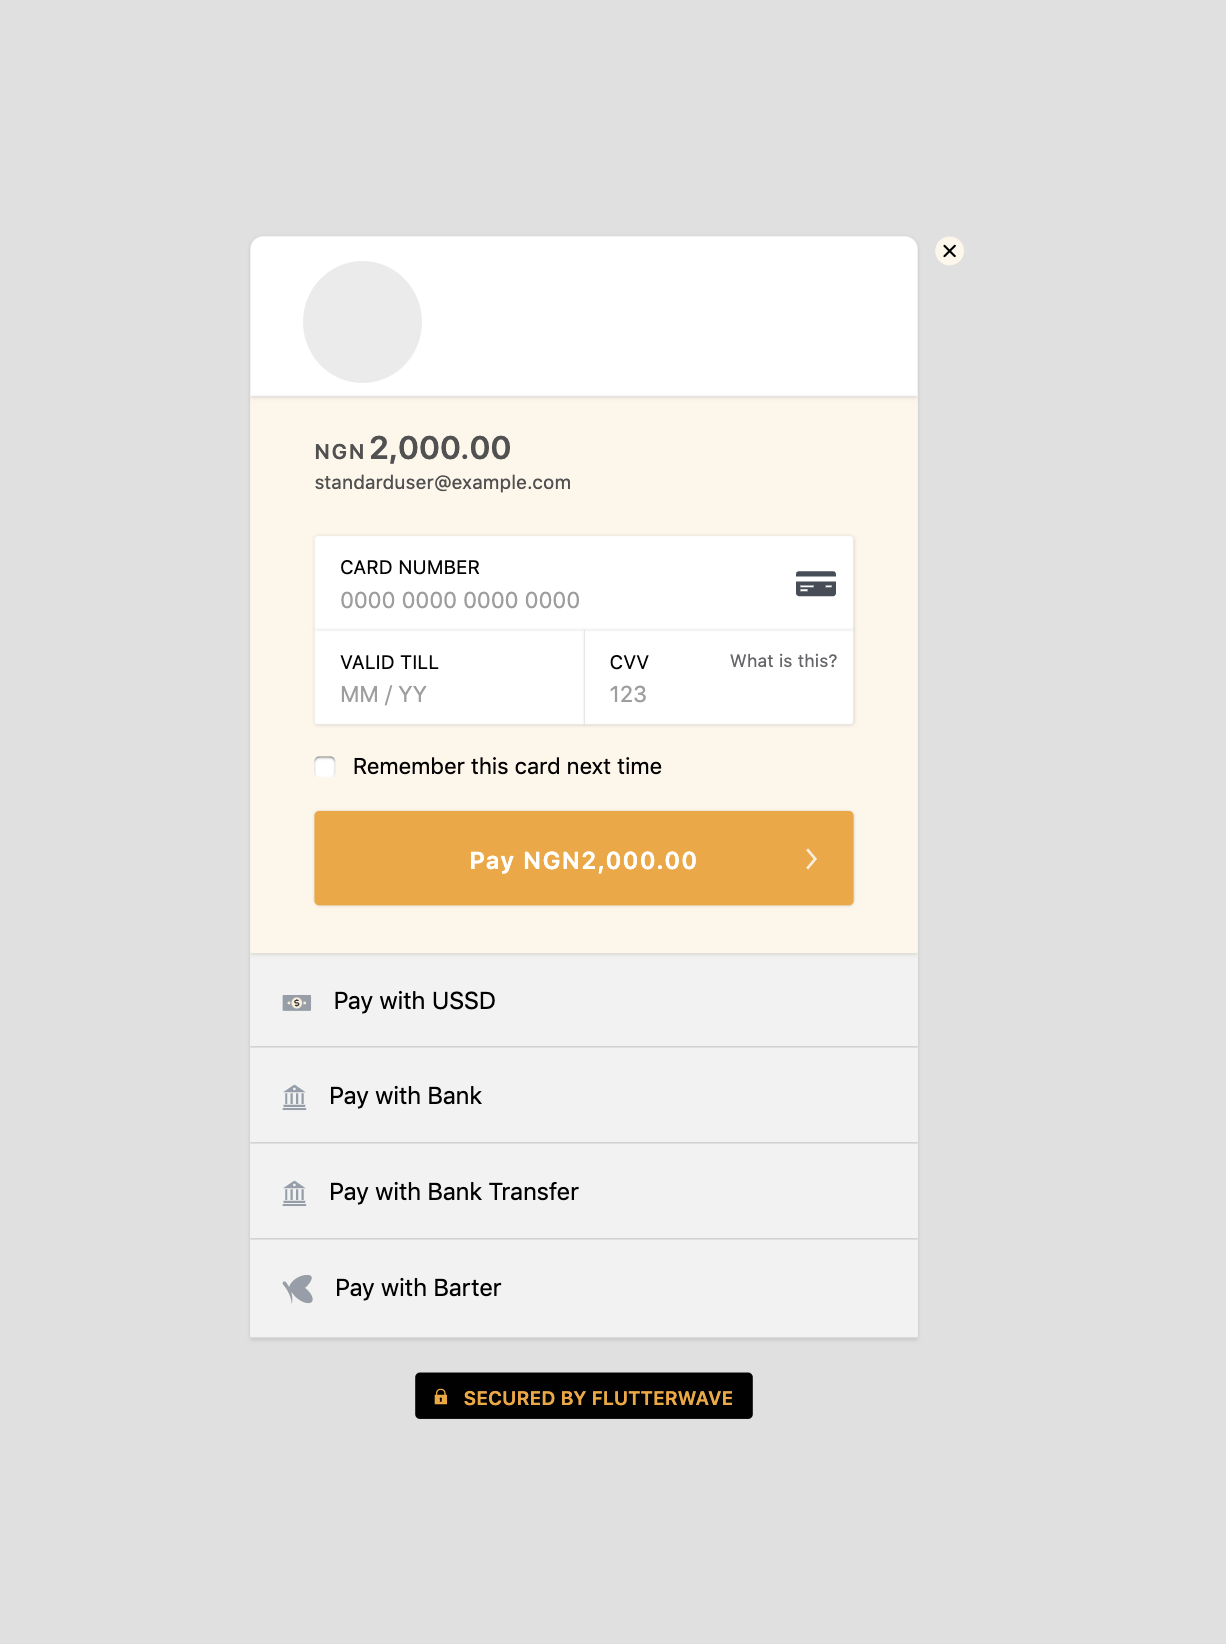
Accept payment quickly and securely using the standard method by calling our /payments endpoint. When you call the endpoint we return a response with a payment link, do a redirect to the link and a secure checkout modal will be loaded for your customer to enter their payment details and complete the payment.
When the transaction is completed we would call your redirect_url and append the payment response as query parameters. Follow the steps below to integrate Flutterwave standard
Standard Endpoint
Step 1 - Collect payment details
Collect the customer's email address and currency if they are not paying in NGN. If customers are required to enter the payment amount themselves, collect that as well. You need to make sure emails are unique per customer.
When you've collected the customers' details, add it to your request object and call our standard payment endpoint.
Flutterwave standard request parameters
Here are the standard request parameters and descriptions:
| Parameter | Required | Description |
|---|---|---|
| tx_ref | True | Your transaction reference. This MUST be unique for every transaction |
| amount | True | Amount to charge the customer. |
| currency | False | currency to charge in. Defaults to NGN |
| integrity_hash | False | This is a sha256 hash of your FlutterwaveCheckout values, it is used for passing secured values to the payment gateway. |
| payment_options | True | This specifies the payment options to be displayed e.g - card, mobilemoney, ussd and so on. |
| payment_plan | False | This is the payment plan ID used for Recurring billing |
| redirect_url | True | URL to redirect to when a transaction is completed. This is useful for 3DSecure payments so we can redirect your customer back to a custom page you want to show them. |
| customer | True | This is an object that can contains your customer details: e.g - 'customer': { 'email': '[email protected]', 'phonenumber': '08012345678', 'name': 'Takeshi Kovacs' } |
| subaccounts | False | This is an array of objects containing the subaccount IDs to split the payment into. Check our Split Payment page for more info |
| meta | False | This is an object that helps you include additional payment information to your request e.g { 'consumer_id': 23, 'consumer_mac': '92a3-912ba-1192a' } |
| customizations | True | This is an object that contains title, logo, and description you want to display on the modal e.g { 'title': 'Pied Piper Payments', 'description': 'Middleout isn't free. Pay the price', 'logo': 'https://assets.piedpiper.com/logo.png' } |
Step 2 - Initiate payment
After collecting payment details, initiate the payment by calling our API with the collected payment details, see example below.
Method: POST
Endpoint: https://api.flutterwave.com/v3/payments
Headers: Authorization: Bearer {SEC_KEY} REQUIRED
{
   "tx_ref":"hooli-tx-1920bbtytty",
   "amount":"100",
   "currency":"NGN",
   "redirect_url":"https://webhook.site/9d0b00ba-9a69-44fa-a43d-a82c33c36fdc",
   "payment_options":"card",
   "meta":{
      "consumer_id":23,
      "consumer_mac":"92a3-912ba-1192a"
   },
   "customer":{
      "email":"[email protected]",
      "phonenumber":"080****4528",
      "name":"Yemi Desola"
   },
   "customizations":{
      "title":"Pied Piper Payments",
      "description":"Middleout isn't free. Pay the price",
      "logo":"https://assets.piedpiper.com/logo.png"
   }
}
When you send this request to our API endpoint, we will return a payment link in the response. Pass this link back to your customer for them to complete the transaction. The link will load up our checkout modal in accordance with the configurations you defined in your initial payment call.
payment_options
Note that the payment options set above will only take effect if the dashboard payment options are disabled on your dashboard settings page. When both are provided/enabled, the dashboard payment options take priority.

Available payment options
Here are all the possible values for payment options available on Flutterwave:
0: "account"
1: "card"
2: "banktransfer"
3: "mpesa"
4: "mobilemoneyrwanda"
5: "mobilemoneyzambia"
6: "qr"
7: "mobilemoneyuganda"
8: "ussd"
9: "credit"
10: "barter"
11: "mobilemoneyghana"
12: "payattitude"
13: "mobilemoneyfranco"
14: "paga"
15: "1voucher"
16: "mobilemoneytanzania"
Flutterwave standard sample response
Here's a sample response object containing the payment link returned:
{
   "status":"success",
   "message":"Hosted Link",
   "data":{
      "link":"https://api.flutterwave.com/v3/hosted/pay/f524c1196ffda5556341"
   }
}
Now when you pass the returned link to the user, they will be provided with our checkout modal to complete the payment like the one below:

Standard payment form
What happens when the user completes the transaction on the page?
When the user enters their payment details, Flutterwave would validate then charge the card. Once the charge is completed we would:
-
Call your specified redirect_url and post the response to you. We will also append your transaction ID (transaction_id), transaction reference (tx_ref) and the transaction status (status) as query params to the redirect_url like:
/tx_ref=ref&transaction_id=30490&status=successful. -
Call your webhook URL (if one is set).
-
Send an email to you and your customer on the successful payment. If email to customers is turned off we wouldn't send emails.
Before you give value to the customer, please make a server-side call to our Transaction verification endpoint to confirm the status of the transaction.
Step 3 - Handling payment response
When the transaction is completed, we send an event to your webhook URL and also append the reference to your redirect_url. You can use either of both responses to verify the payment and give value to the customer.
You can pick up the transaction ID from the response or use the post body sent to your redirect_url to verify the transaction and give value. See Transaction verification
Updated almost 4 years ago
